Camera Angles for Architectural Renders: Eye Level, Two-Point Perspective, Aerial Views and Lens Choice
Short answer: For interiors, put the camera at eye level (about 1.5 m, roughly 5 ft), keep it level and shoot from a corner, with a 24-35mm lens as a common start. For exteriors, a three-quarter or two-point view from standing height reads best; save aerial views for site and context. BentoMesh, a Turkish-first AI visualization platform, exposes these choices as Angle, Lens, Composition and Focus in Render Lab's Generate from Scratch form (called Create from Scratch on the Create Render page). Upload a source image, though, and its camera is kept, so you set the angle in your model or when you take the photo. New frames made with Different Angles guess at whatever the source never showed.
Batuhan Oğan · 14 min read · Published: 2026-10-15 · Updated: 2026-10-15
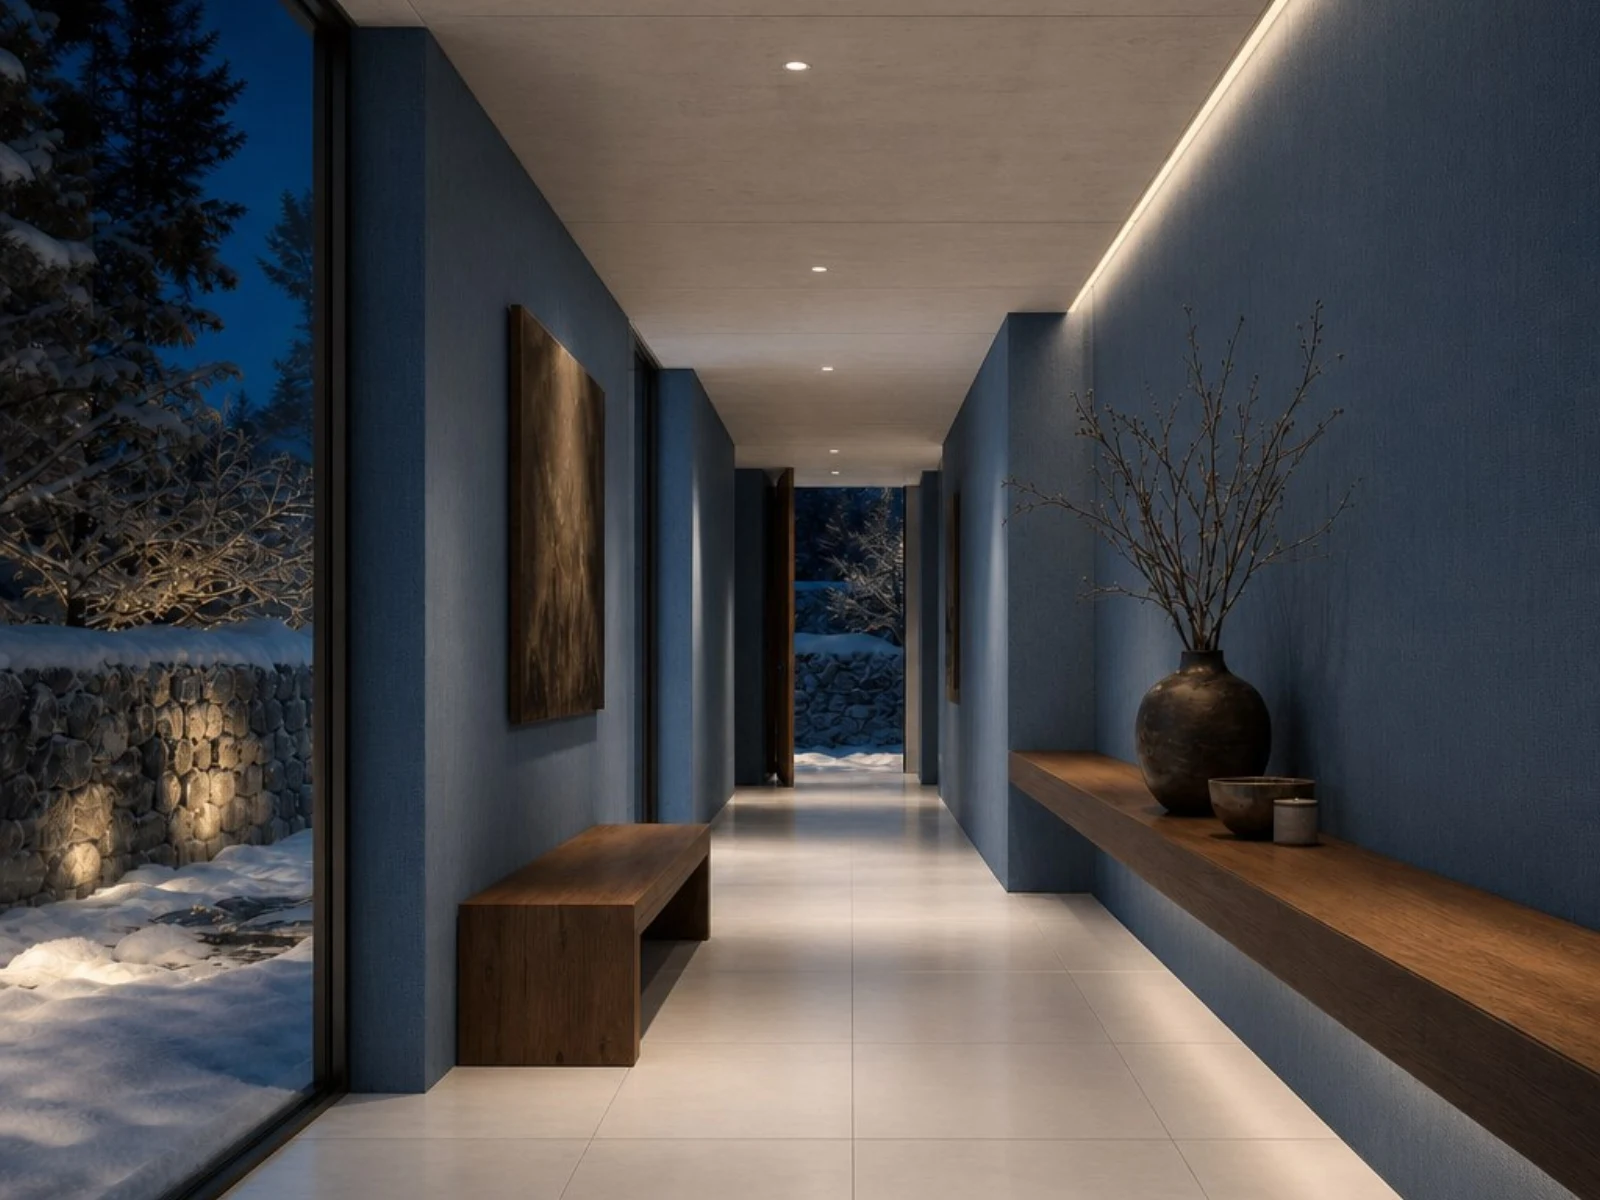
Why does camera angle matter so much in an architectural render?
The camera angle decides how big a space feels, what the viewer reads first and what story the image tells; the same model can look like two different projects from two viewpoints. An eye-level frame puts the viewer inside, a high frame explains the layout, and a low frame makes a building feel more monumental.
In BentoMesh, what sets the camera depends on where you start:
| What you want to do | Where in BentoMesh | What sets the camera |
|---|---|---|
| Generate a new scene and pick the angle | Generate from Scratch in Render Lab, or Create from Scratch on the Create Render page | The form's Angle, Lens, Composition and Focus options |
| Render from a photo, sketch or model screenshot | Upload it as a source image in Generate from Scratch | The source image's camera; the form locks those options |
| Render from a SketchUp or 3ds Max model | The plugins | The active view in your model |
| New frames from a finished render | Different Angles in Render Lab | Preset angle recipes; unseen areas are guessed |
| Moving aerial footage | Drone Shot | The video's camera movement |
| A second opinion on angle and composition | Render Analysis | Nothing; it scores and critiques without moving the camera |
The rule that saves the most time: once you upload a source image, the form says “The source image’s camera is kept”, locks Angle, Lens and Composition with a “From source” tag and disables Focus and Straighten verticals. Edit Render's style task also keeps the camera angle. On a real project, the angle is decided before you render: in the model, or when you take the photo.
What is the best camera height and angle for interior renders?
Eye level is the safest default: the Generate from Scratch form selects it for interiors and asks the model for a camera height of about 1.5 m (roughly 5 ft). That is how someone walking in sees the room, so ceiling and floor stay balanced and furniture reads naturally.
| Angle in the form | What the form asks for | Pick it when |
|---|---|---|
| Eye level (default) | About 1.5 m (5 ft), eye height | Most rooms; your first try |
| Wide from corner | About 1.4 m (4.6 ft), wide view from a corner | You need the whole room in one frame |
| Two-point | Two-point perspective from a corner | Two walls and the corner should read together |
| 3/4 view | Three-quarter view from a corner | One wall leads, with depth behind it |
| Seated height | About 1.1 m (3.6 ft) | Living rooms, dining areas, lounges |
| Raised | About 2 m (6.6 ft) | Showing a worktop, the layout and more floor |
| Detail | Close detail shot | Material joints, fixtures, furniture details |
These option names come from the desktop browser form; on a phone browser the Create Render page shows a single camera angle list with different names, without Lens, Composition, Focus or Straighten verticals.
Quick rules
- Small room: use Wide from corner or Two-point and look toward the opposite corner.
- Corridor or symmetrical space: stand in the middle at eye level, look down the axis and pick Symmetric under Composition, like the one-point cover image of this guide.
- Rooms where people sit: Seated height shows what someone on the sofa sees, and the ceiling feels taller.
- Kitchens and bathrooms: Raised reads the worktop and layout better. With a phone, lift it and keep it level instead of tilting it down, and the verticals stay straight.
Which camera angle works best for exterior renders, from street level to aerial?
A three-quarter view is the most readable starting point for exteriors and the form's exterior default: two facades seen together from standing height, about 1.6 m (5.2 ft). Two facades show the massing; a flat single-facade view explains the surface but loses depth. The exterior options:
- Street level: about 1.6 m; the entrance as a pedestrian sees it.
- Front elevation: straight-on facade rhythm; close to a technical elevation, but not to scale.
- 3/4 view and Two-point: two facades from a corner; the main presentation frame.
- Wide: standing height, taking in the surroundings.
- Bird's-eye: about 60 m (200 ft), looking down at roughly 45 degrees; site and context.
- Low drone: about 15 m (50 ft); roof and garden while the facade still reads.
- Low angle: looking up to stress height and the entrance; converging verticals can become part of the look. To let them converge, switch off Straighten verticals in the Camera section; left on, the form asks for straight verticals as well.
- From a rooftop: slightly raised, from a neighboring roof; realistic for tight urban plots.
- Telephoto: distant and compressed; pulls a mountain or the sea closer to the building.
- Facade detail: windows, cladding joints, railings.
A caution about aerial views: the neighboring buildings, roads and trees are an environment the AI invents. They do not replace a real site plan and are not evidence for any official submission; for real context, use your own photo or model as the source. If you want the aerial idea in motion, Drone Shot turns a render or photo into a short aerial-style video.
18mm, 24mm, 35mm, 50mm or 85mm: which focal length should you use?
A shorter focal length fits more space and exaggerates depth; a longer one narrows the view and flattens depth. The form offers 18, 24, 35, 50 and 85mm, each with a small field-of-view cone.
| Lens | Approx. horizontal field of view | Typical use | Watch out for |
|---|---|---|---|
| 18mm | 90° | Very small rooms, bathrooms, narrow corridors | Stretched edges; the room looks bigger than it is |
| 24mm | 74° | General interior views | Furniture near the edges can look pulled |
| 35mm | 54° | Exteriors, large living rooms, a natural look | In a small room the corners fall out of frame |
| 50mm | 40° | One zone of a room, a furniture group | Too tight for an overall view |
| 85mm | 24° | Details, materials, facade details | The background compresses; the whole space is lost |
These are approximate full-frame values from general photography, matching the form's cone diagrams.
What does Auto do?
Leave Lens on Auto and the form picks a value from your angle and shows it: 24mm for most interior angles, 18mm for Wide from corner; 35mm for most exterior angles, 24mm for Wide; 85mm for Detail, Facade detail and Telephoto. Without a specific reason, Auto is a good start.
24mm vs 35mm for interiors
24mm shows more of the room; 35mm looks closer to natural vision and keeps furniture calmer. As a rough rule, stay in that range indoors. 18mm makes a small room look larger than it is: fine for explaining a space, misleading in a sales or rental listing, so give the room size from the plan, not the image.
How do you keep verticals straight and compose a stronger render?
Vertical lines converge when the camera tilts up or down, so for architecture the camera stays level. For photos and renders alike, to see from higher or lower, move the camera instead of tilting it.
- In Generate from Scratch: the Straighten verticals toggle in the Camera section is on by default and asks the model to keep vertical lines straight, as in architectural photography. It is guidance, not a guaranteed geometric correction, so check the result.
- In SketchUp: Camera > Two-Point Perspective keeps verticals parallel. In Camera > Field of View you can type a value with mm (for example 24mm) to set a focal length.
- In 3ds Max: the Physical Camera's Auto Vertical Tilt Correction does the same job. For vertical frames, turn on Safe Frame (Shift+F) so the frame you see is the frame the plugin sends.
- With a phone: turn on the grid and use the 1x lens instead of the ultra-wide.
Composition and focus
The Composition options describe how the frame is balanced:
- Balanced (default): an even, general frame.
- Symmetric: centered one-point perspective; corridors, axial entrances.
- Thirds: the subject on a rule-of-thirds line; a view window or statement piece.
- Foreground: a softly blurred foreground element adds depth.
- Negative space: empty area for text on a board, poster or social post.
Under Focus, All in focus is the default for architecture; Soft background separates the subject in a detail shot. For a second opinion on a finished image, Render Analysis gives a 1-10 design score, strengths, critique and professional tips; it does not change the angle itself.
Can you get multiple angles from one render, and where does AI make things up?
Yes, but treat the results as mood and variety, not evidence: a new viewpoint built from one image has to guess at anything the source did not show. In Render Lab, once a result is ready, the Different Angles button offers sets of 4, 6, 8, 10 or 12 angles; Space Workshop (Mekan Atölyesi) has it on its result screen too. Different Angles runs in a desktop browser.
| Set | Angles added |
|---|---|
| 4 angles | Wide Angle, Top View, Left Perspective, Right Perspective |
| 6 angles | + Hero Shot, Macro Detail |
| 8 angles | + Worm's-Eye View, Close-Up |
| 10 angles | + Doorway Frame, Hero Furniture |
| 12 angles | + Eye Level, Window View |
The recipes ask for measured moves: Wide Angle steps back about a meter with a slightly wider lens, Left and Right Perspective shift about a meter and turn roughly 25 degrees, and Top View looks down steeply from ceiling height so the layout reads like a plan. They never ask the camera to turn around or invent a window, because an AI forced to fill unseen space tends to invent cabinets, mirrors or artwork. Still, a step-back view like Wide Angle or a low view like Worm's-Eye View brings in floor, wall or ceiling the source never showed, which is guessed, and Doorway Frame adds a door jamb in the foreground. That lowers the risk without removing it.
When to use it
- Good for: a social media series, a mood board, one atmosphere across several frames, a Macro Detail of a material.
- Not for: showing a client “what the back wall will look like”, construction decisions, or a jury submission built on a view the source never showed.
- For a reliable new angle: set the camera in your model; the SketchUp and 3ds Max plugins send that active view. In an existing space, take a new photo.
Each angle uses its own credits, and Download All saves every result in one ZIP.
How should you plan a presentation set, and what are the honest limits?
Three to five frames cover most presentations: an overview, an eye-level view, a detail, and one angle by day and by evening.
| Frame | Interior suggestion | Exterior suggestion |
|---|---|---|
| Overview | Wide from corner or Two-point | 3/4 view or Bird's-eye |
| Human eye | Eye level or Seated height | Street level |
| Detail | Detail, 50-85mm, Soft background | Facade detail, 85mm |
| Day and evening | Same angle; Daytime and Blue hour | Same angle; Golden hour and Night |
Note: without a source image, each Generate from Scratch run builds a new scene, so picking another angle does not show the same design from elsewhere; you get a different room. Build a consistent set from cameras in your model (through the plugins) or from one source image per view. Different Angles can derive frames from one render, with guessed areas. The names in the table are framing guidance.
For day and evening from the same camera, work from a source image: Time of day then offers Keep source lighting, Daytime, Golden hour, Blue hour and Night, and at blue hour and night light comes only from fixtures and openings already in the source. For scale, Add People & Cars adds people to interiors and people and cars to exteriors, aiming to keep the architecture and camera. Finish with Upscale at 2x or 4x.
Honest limits
- Not a measurement. Heights and millimeter values are instructions to the model, not a measured camera or a scaled drawing.
- Geometry can change. Window counts or furniture shapes may differ; BentoMesh does not promise geometry is fully preserved.
- New angles are guesses. Unseen areas and aerial surroundings are AI estimates; Straighten verticals is guidance, not a guarantee.
- Processed in the cloud. Images pass through the BentoMesh server and a third-party AI provider; check permissions first on confidential work.
- An illustration, not a photo. Label renders as renders in listings, and do not sell a wide-lens room as its real size.
- Watermark on the free tier. Images made on subscription plans carry no watermark.
- No Android app. The form and Different Angles in this guide are desktop web tools; the mobile app is iPhone only.
Registration is free; when you verify your email or phone number, or sign in with Google or Apple, a one-time welcome credit is added to your account, subject to the conditions on the sign-up page. Current packs are on the credits page. This guide is also available in Turkish: Türkçe sürüm / Read in Turkish.
Frequently asked questions
What is the best camera height for interior renders?
Eye level, about 1.5 m (roughly 5 ft), is a safe starting point, and it is what the Eye level option in BentoMesh's Generate from Scratch form asks for. Seated height, about 1.1 m, suits living and dining rooms; Raised, about 2 m, shows a worktop and layout. At any height, keep the camera level so vertical lines stay straight.
Is 24mm or 35mm better for interior renders?
Both are common. 24mm fits more of the room and suits small and medium spaces; 35mm looks closer to natural vision and works well in larger rooms. 18mm shows a tiny room whole but makes it look bigger than it is, which can mislead in a listing. If unsure, leave the lens on Auto and the form picks one for your angle.
Why do vertical lines lean in my render?
Because the camera was tilted. When the camera points up or down, vertical lines converge. Keep it level and change height by moving the camera, not tilting it. In Generate from Scratch, Straighten verticals is on by default and asks the model for straight verticals; SketchUp has Two-Point Perspective, and 3ds Max has the Physical Camera's Auto Vertical Tilt Correction. Still check the final image.
Can I change the camera angle after uploading a source image?
No. With a source image the form keeps the source camera, locks Angle, Lens and Composition with a From source tag and disables Focus and Straighten verticals. Edit Render's tasks cover material, light, add, remove and style, not the camera. For a different angle, set a new camera in your model or take a new photo; Different Angles can derive frames from a render, but they include guesses.
Can AI generate multiple angles from one render?
Yes. Different Angles in Render Lab creates sets of 4 to 12 new frames, such as Wide Angle, Top View and Left or Right Perspective, using measured camera moves. Anything the source did not show is estimated, so furniture or decor can be invented. Use these frames for variety and mood; use your model or a new photo when a view must be accurate.
What is the best camera angle for an exterior render?
There is no single best angle, but a three-quarter view from standing height is the most readable start and the form's exterior default, because two facades show the massing. Use Front elevation for facade rhythm, Street level for the pedestrian experience, Bird's-eye for site and context, and Low angle to stress an entrance. For details, Facade detail with 85mm works well.
What is the difference between an aerial render and a drone video?
In Generate from Scratch, Bird's-eye is a single still frame from about 60 m looking down at roughly 45 degrees, and Low drone looks from about 15 m. Drone Shot is a separate tool that turns a render or photo into a short aerial-style video. In both, surroundings and facades the source did not show are AI estimates, not a real site plan or real footage.